
Assigning & Scheduling Forms
Instead of filling out a Custom Form yourself, you can send it to other people to complete. There are three ways to do that: assign it once to specific people, put it on a recurring schedule so copies go out automatically, or post a Scan on Demand QR code that anyone can scan to start their own copy. Assigning is a manager task — reporters can only fill out forms assigned to them.
Start an assignment
In the left navigation, open Custom Forms and click New Custom Form.
Search for and select the published template you want to send out.
Choose Assign it — Send it to one or more people to complete — once, or on a recurring schedule. (Choosing Fill it out instead opens the form for you to complete yourself.)
In the assign window, pick the assignment type at the top: Immediately, Repeating, or Scan on Demand.
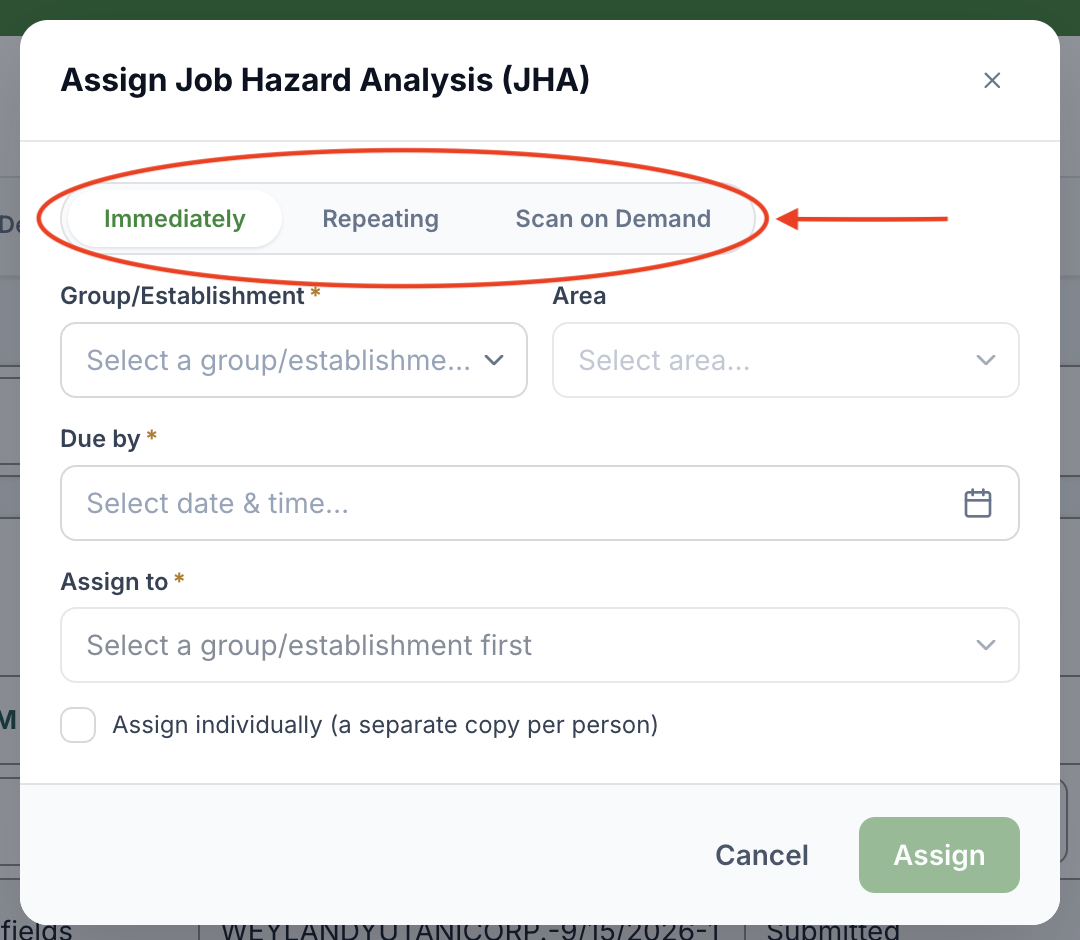
Assign it once (Immediately)
Fill in:
Group and Area — where the form is filed. (These reflect your workspace's own naming.)
Due by — the date and time the form is due.
Assign to — the people who should complete it (only members of the chosen Group are listed).
Assign individually (a separate copy per person) — leave this off to send one shared copy, or turn it on to give each person their own separate copy.
Click Assign. Each assignee gets the form in their My To-Dos, due-dated, and you'll see Custom Form assigned.
Set up a recurring schedule (Repeating)
A repeating schedule sends the form out automatically on a cadence — great for daily inspections, weekly toolbox talks, or monthly audits. Set:
Frequency — Weekly, Monthly, Quarterly, Yearly, or Custom.
Assign every — this changes with the frequency:
Weekly — pick one or more days of the week.
Monthly — 1st of the month, 15th of the month, or Last day of the month.
Yearly — a specific date, such as 1st of January.
Custom — every so many Days / Weeks / Months / Years, with a Starting on date.
Quarterly needs no further setting.
Due after — how long after each copy goes out it's due (a number of Days / Weeks / Months / Years), and the time of day it's due (at).
Assign to and Assign individually — the same as a one-time assignment.
Click Schedule. The schedule then runs on its own — a fresh copy lands in each assignee's To-Dos every occurrence — until you pause or delete it. You can edit or pause it later from the Repeating tab (see below).
Post a Scan on Demand QR code
Scan on Demand is for forms you can't assign to specific people ahead of time — a sign-in sheet at a site entrance, for example. As the window explains: A QR code will be generated to print and post. Anyone who scans it in the mobile app starts a new copy of this form — no assignment or due date needed. They choose the Group and Area as they fill it out.
There's nothing else to configure — click Create QR code. The code is generated for you to print and post; you can download it anytime from the Scan on Demand tab (Download QR Code). People scan it with the iReport mobile app to start their own copy.
Where assignments live
The Custom Forms list has four tabs:
Active — forms currently in progress or completed (with their status, Group/Area, who they're assigned to, due date, and form number).
Repeating — your recurring schedules. Open one to edit it, or use the row menu to Pause / Resume it.
Scan on Demand — your posted QR codes, each with a Download QR Code link. Managers can delete a code from here.
Archived — forms you've archived out of the Active list. Managers can Archive and Unarchive forms in bulk.
Good to know
Reporters can't assign. Picking a template just opens it for them to fill out, and they only see forms assigned to (or created by) them.
A recurring schedule has no end date — it keeps sending copies until you pause or delete it on the Repeating tab.
With Scan on Demand, the person scanning chooses the Group and Area themselves as they fill out the form — you don't set those when you create the code.
Archiving and deleting are manager actions.