
Managing Maintenance Providers and Internal Techs
Your maintenance providers and your internal technicians are two lists you build once and then pick from everywhere. Providers are the outside companies that service your equipment — adding one here means every unit they look after can be pointed at the same record, so a change of email address only has to be made in one place. Internal Techs are your own people who service equipment themselves, and being on that list is what gives them a Maintenance option in the mobile app when they scan a machine.
Both lists live behind one button, and both are Admin and Collaborator only.
Opening the lists
Go to General → Equipment.
Click Manage Providers in the page header. The Maintenance Providers window opens with two tabs: Providers and Internal Techs.
You can also reach it from a single unit: while editing a piece of equipment with an external provider assigned, the Manage providers link under the provider picker opens the same window. Closing it refreshes the picker, and it deliberately does not reload the unit — any edits you had in progress are still there.

Providers — outside maintenance companies
Adding one
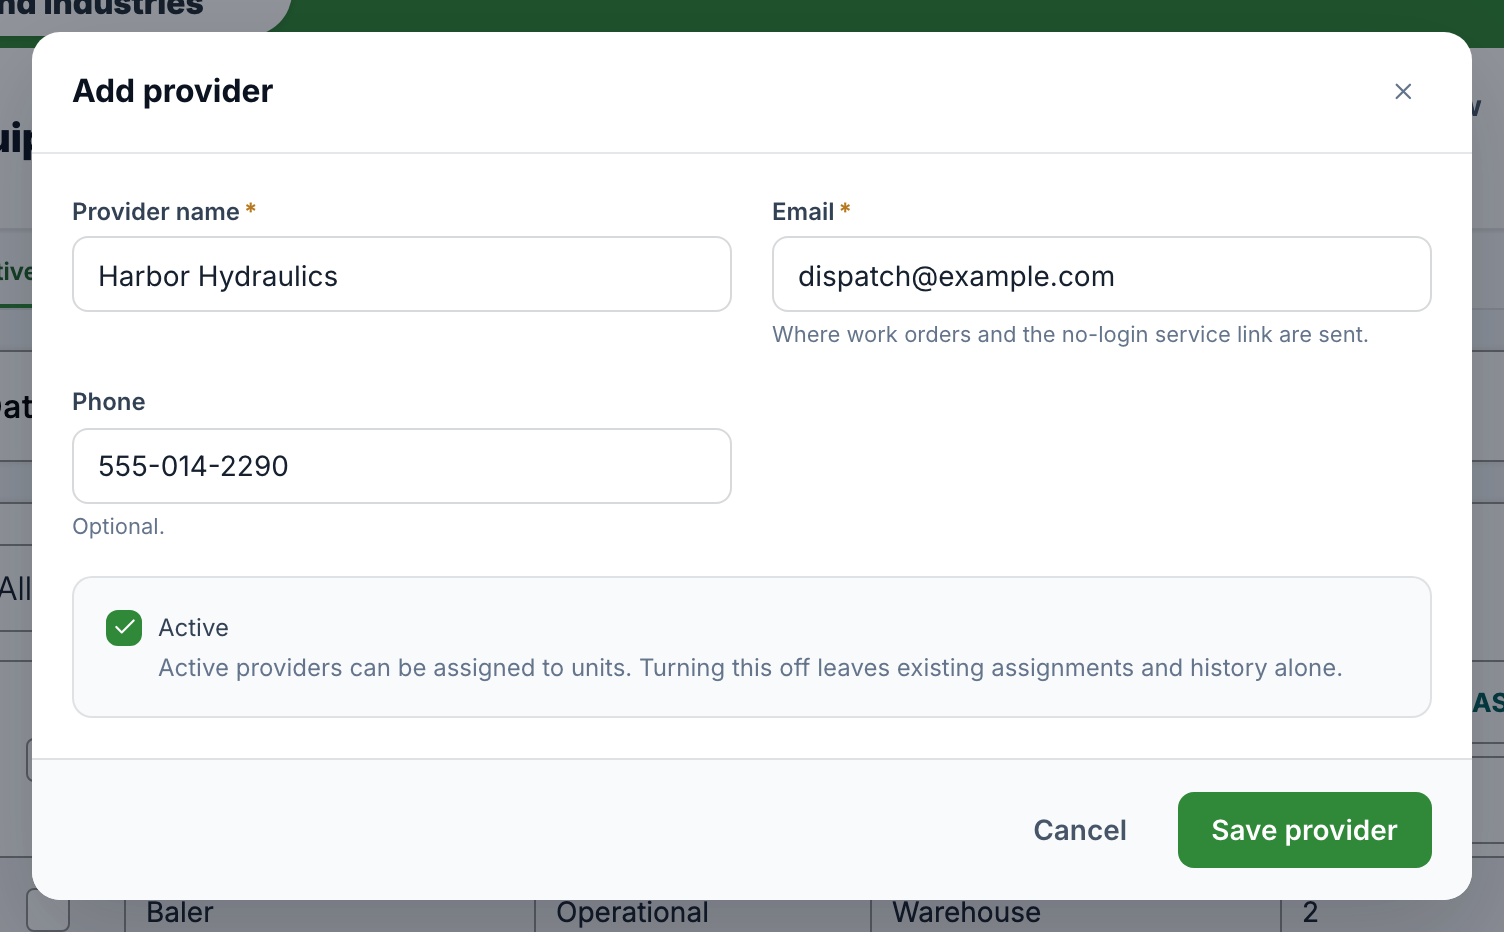
On the Providers tab, click Add Provider (or Add your first provider if the list is empty).
Provider name (required).
Email (required) — where work orders and the no-login service link are sent. It has to be a complete address.
Phone — optional, and formatted as you type to match every other phone number in the platform.
Active — on by default. Active providers can be assigned to units.
Click Save provider.
If the name matches a provider you already have, a warning appears under the field. It does not block the save — two genuine branches of the same company is a real thing — but it gives you the chance to edit the existing one instead.
Reading the list
Each row shows the provider's name, email, phone, and how many units are assigned to them (or none yet). A provider that has been switched off carries an Inactive tag. The count line above the list reads, for example, 5 providers · 4 active, and the search box filters on name, email, or phone.
Editing one
Click the pencil on a row. If the provider is attached to units, a banner says how many and warns that changes here update every one of them — this is the one place these details live.
Deactivating vs deleting
These do different things, and the difference matters:
Deactivating (unchecking Active in the edit form) takes the provider out of the pickers while leaving existing assignments and history alone. A unit already assigned to them keeps working — its work orders still go to them — and the unit shows a note asking you to pick a replacement when you have one.
Deleting (the bin icon) removes them and unassigns every unit pointing at them. Those units then have nobody to dispatch when service comes due.
Because of that, deleting a provider who is still in use opens a dialog that names the count and offers Deactivate instead alongside Delete anyway. Deleting one with no units assigned is a plain confirm. Either way, past work orders keep their own record of the provider and are not affected.
Internal Techs — your own people
Being on this list gives somebody a Maintenance option when they scan a unit in the mobile app, so they can start a service or report a repair without waiting to be dispatched. Nobody has that option until they are on the list. Outside companies belong on the Providers tab instead.
Adding techs
Open the Internal Techs tab and click Add Techs.
Search and tick the people who service your equipment themselves.
Click Add 1 tech (or Add N techs).
Somebody who is already on the roster still appears in the picker, marked Already a tech, rather than disappearing — so you can tell "already added" from "not found".
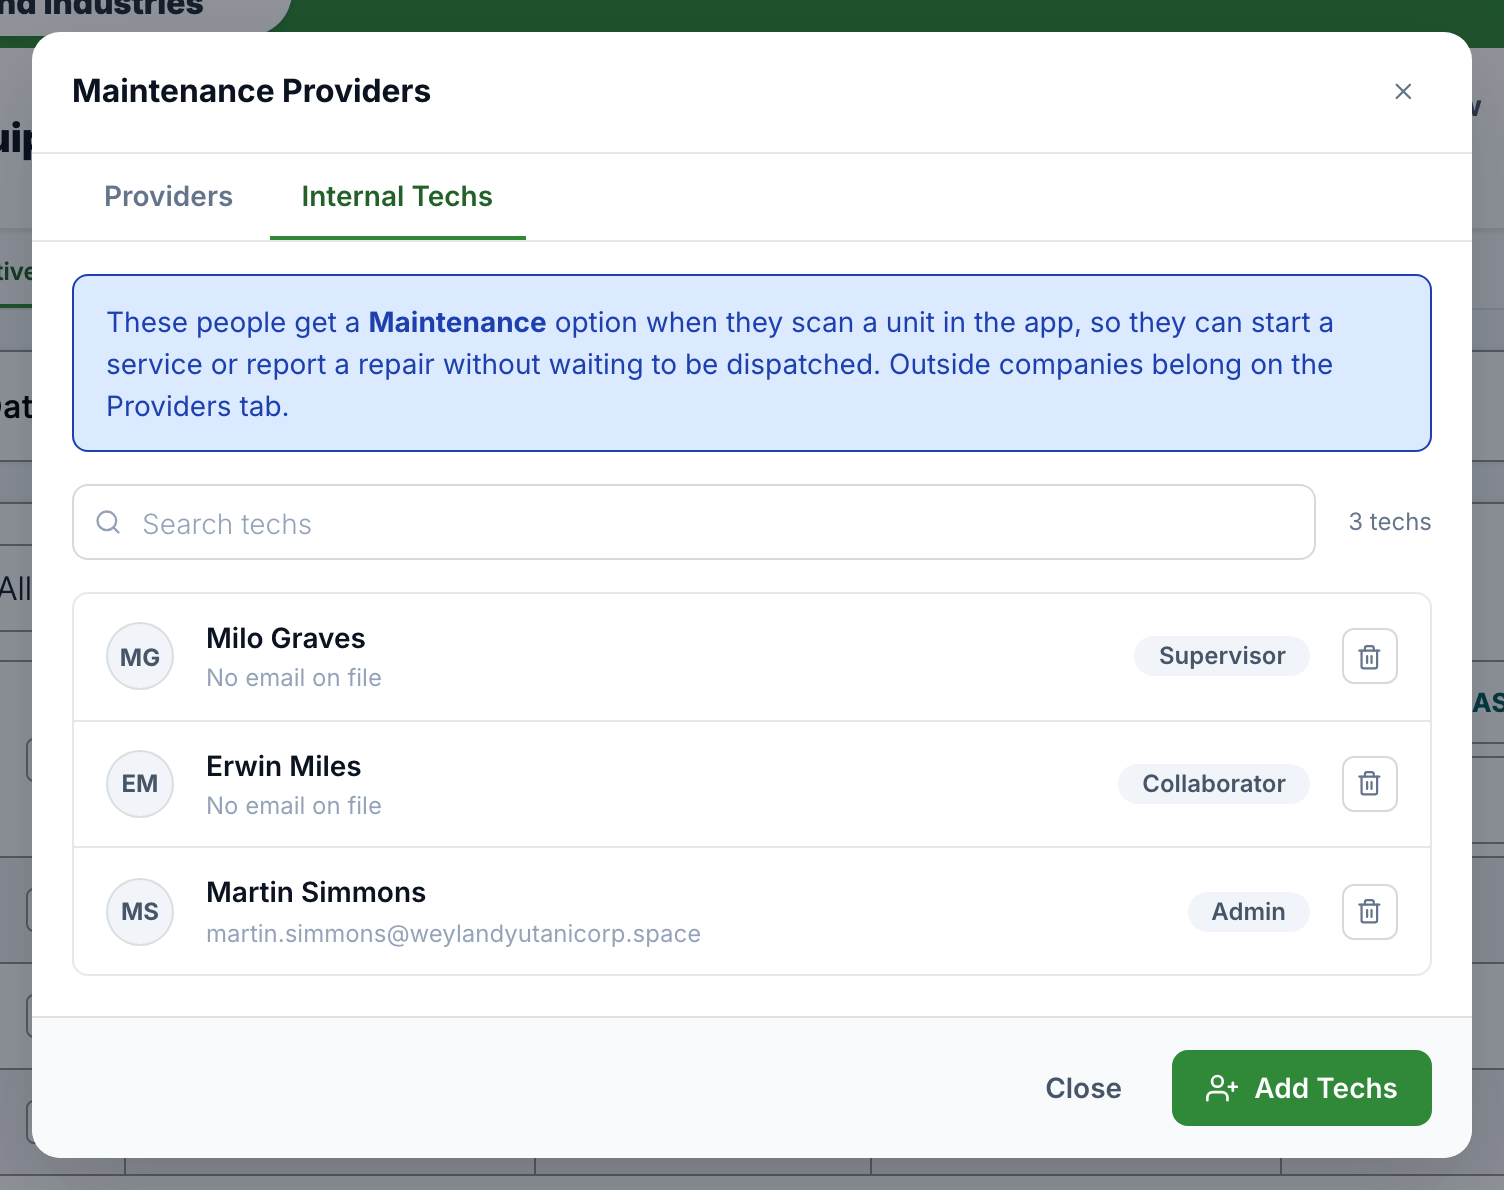
Reading the list
Each row shows the person's name, email, and access level. Someone whose account has since been switched off is shown and tagged Deactivated rather than hidden, so you can spot them and take them off the roster. The bin icon removes a tech; if they work for more than one of your companies, removing them here only affects this one.
Good to know
Roster membership is not a permission. Access level and the tech roster are separate questions — a Reporter can be a technician, and an Admin who is not on the roster does not get the Maintenance option.
Internal Techs is not the same list as a unit's assigned staff. A unit's Provider — internal staff decides who gets sent a work order when service comes due. Internal Techs decides who can start one nobody sent. The maintenance card offers an Internal Techs filter on the staff picker for convenience, but it never limits you to that roster.
Both lists are company-wide, so a provider or a tech you add is available on every unit in that company.
A unit configured before the provider list existed may still carry a typed-in name and email. Work orders still reach that address, and a one-click Add to provider list button on the unit moves it onto the list — reusing an existing entry with the same address rather than creating a duplicate.